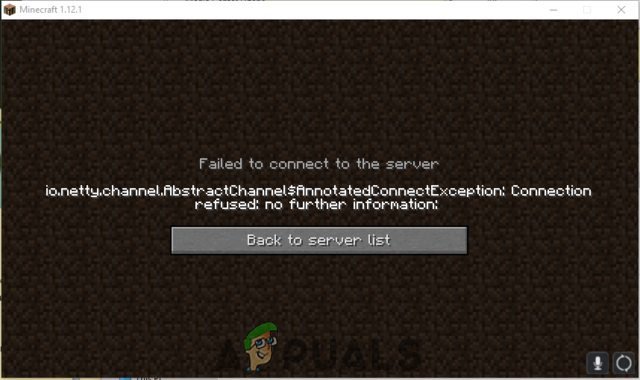
Minecraft is a game developed by Manjong in 2011. It’s a sandbox game having a huge player base, with about 91 million players joining in on the fun monthly. Nonetheless, some users have been experiencing the following error while trying to connect with the server: io.netty.channel.AbstractChannel$AnnotatedConnectException: Connection refused: no further information.”
A great number of users have been experiencing io.netty.channel.AbstractChannel$AnnotatedConnectException: Connection refused: no further information problem, and therefore to solve this problem, this article deals with the source of the problem and refers to few solutions which you can opt to if you are a Minecraft user and are experiencing the aforementioned problem.
What Causes the io.netty.channel.abstractchannel$annotatedconnectexception
Error
IP Address Issue: Using the wrong IP address or port listed can cause hindrance while trying to connect with the server. For that reason, it is advised to the users that they use a static IP address, or they should make it a habit to edit their ISP assigned IP address from time to time for the smooth connection with the server.
Outdated Java: For Minecraft to work properly, you need to keep Java updated to the latest version. If your game launcher is updated to the latest version and your Java is lagging behind, then it would cause trouble. To create a smooth and hassle-free gaming experience, including connection to the server, you need to keep both your launcher and Java updated to the latest version.
Firewall: Another main reason for your connection error can be the Windows Firewall that you are currently using. In other words, your Firewall is preventing your access to the game. In other words, you have to change the settings of your Firewall for the game to work properly. Therefore you need to add the game directory and the java files in the Firewall exclusion list.
Software Incompatibility: There is a list of software that is not compatible with Minecraft. The presence of any of this software can prove to be very problematic while playing Minecraft. If you have any of these installed on your computer, then it can cause conflict with the game. The following are the list of software:
Antivirus and Firewalls
- AVG Antivirus (All versions)
- BitDefender (All versions)
- ByteFence (All versions)
- Comcast Constant Guard (All versions)
- Comodo Internet Security (All versions)
- ESET Antivirus (All versions)
- Kaspersky Internet Security (All versions)
- Norton Antivirus (All versions)
- PCKeeper / MacKeeper (All versions)
- Lavasoft Ad-aware Web Companion (All versions)
- McAfee Antivirus / Intel Security (All versions)
- ZoneAlarm Firewall (All versions)
- Webroot SecureAnywhere (All versions)
Parental Control Software
- Covenant Eyes (Versions below 7.2.41)
- Qustodio (Some old versions)
Game Enhancement Software
- Discord (All versions)
- D3DGear (Versions below 4.50.1846)
- GeForce Experience (All versions)
- Evolve and/or Player.me (All versions)
- Razer Synapse /Razer Cortex (All versions)
- Symless Synergy (All versions)
VPNs and Networking Bridging Software
- Hamachi/Tunngle (All versions)
- Hola Unblocker (All versions)
- All paid VPNs and some pain ones too.
Malware and Adware
- PremierOpinion (All versions)
- RelevantKnowledge (All versions)
- WebCompanion (All versions)
3 Ways to Fix io.netty.channel.AbstractChannel$AnnotatedConnectException: Connection refused: no further information Error on Minecraft
There are mainly three solutions for fixing the error which many of the Minecraft users are facing. They are:
Method 1: Resetting Internet
Resetting the internet can automatically reset the IP address unless you have a static IP address. Therefore we have to reinitialize the settings by power cycling. For that:
Step 1: Disconnect the router.
Step 2: Reconnect the router after a few minutes.
Step 3: Connect to the internet and try to connect with the server.
Read More:
- Taskbar Showing in Fullscreen
- This Site Can’t Be Reached
- Confirm Form Resubmission
- CompatTelRunner.exe High CPU and Disk
Method 2: Adding Exception in Firewall
As stated before, the Firewall you are using can be causing a hindrance to your connection with the server. Therefore to add an exception in the Firewall, you have to follow the following steps.
Step 1: First of all, click on the Start menu and select Settings.
Step 2: Secondly, select ‘Updates and Security’ from the settings tab.
Step 3: Next, in the left pane, you will find a ‘Windows Security’ option. Click on that and select ‘Firewall and Network Protection.’
Step 4: After that, click on the ‘Allow an app through Firewall‘ option.
Step 5: Then, click on ‘Change Settings’ and select Yes on warning prompt.
Step 6: Select ‘Allow Another App’ and click ‘Browse.’
Step 7: Go to the game directory and select the game and launcher executable.
Step 8: Now repeat the process and click on the directory for Minecraft Servers
Step 9: Select ‘Maxwell’ and ‘MinecraftServer’ folder.
Step 10: Now allow both the Java Executables.
Step 11: Repeat the process. Instead of ‘Allow Another App‘ after selecting the ‘change‘ option, scroll down and allow all the ‘Java Platform SE Binary’ through the ‘Private’ and ‘Public‘ networks.
Step 12: Open Minecraft and try to connect with the server.
Method 3: Adding the IP Address and Port
The IP address changes every couple of days if it is not a static one. So it is required to check the port and the correct IP address for the game. For that, you have to follow the following steps –
Step 1: First of all, click on the search bar and type in ‘Command Prompt.’
Step 2: Then, right-click and select ‘Run as Administrator.’
Step 3: Type ‘iconfig’ and make a note of the ‘IPV4’ address.
Step 4: Go in to ‘Minecraft Servers folder → Maxwell (some random numbers) → MinecraftServer’ and click open the ‘Server Properties’ text document.
Step 5: Note the ‘Server Port.’ For example:- ‘25565’. It should be similar in most cases, but in some, it is not.
Step 6: Open Minecraft to the ‘Play Multiplayer‘ option.
Step 7: Select the server which you want to join and click on ‘Edit.’
Step 8: You can choose the server according to your preference, but the address has to be IPV4. For example: ‘XXX.XXX.X.X:25565’ the ‘25565’.
Step 9: Click on ‘Done‘ and then ‘Refresh.’
Also Read:
- Rats! WebGL Hit A Snag
- Dragon Age Inquisition Won’t Launch
- Avast Service High CPU
- Android.Process.Media Has Stopped
Conclusion
In this article, we have mentioned the causes of io.netty.channel.abstractchannel$annotatedconnectexception error. Along with the causes, we have discussed the solutions too. You can follow the methods mentioned above to solve the issue. Hopefully, you will get rid of the io.netty.channel.AbstractChannel$AnnotatedConnectException: Connection refused: no further information error using the above solutions.


